As you have probably heard many times before, “A picture is worth a thousand words.” However, a photo image is much more than a thousand times larger than a series of words to describe it. If your photos or images are too large, your blog post or web page will load slow, sometimes horribly slow, especially on a cellular or slow Wi-Fi connection. Photos from today’s digital cameras may be well over 3000 pixels wide and up to 3MB in size, or larger. A single unoptimized raw image can be larger than all the rest of all the files on an entire web site combined. So, in most cases you want to avoid uploading a photo directly from a digital camera or modern smartphone. (Note, some online services may automatically resize and optimize your images before you upload them.)
Before we look at ways to reduce image sizes, lets consider some numbers. Perhaps the photo from your high-resolution digital camera is 3000 pixels wide with a 3MB file size and you want to insert that picture into the corner of your document. When you insert a 3000 pixel or 3MB (3,000,000 bits or 3,000K) photo into your document, you just increased a text-based file that might have been 30K (30,000 bits) to a bloated size of over 3MB (now 3,030K). Add a second image and it will grow to about 6MB.
Keep in mind, a typical website width is 1200 pixels or less. So, if you wanted to add a 600-pixel photo in the upper right corner quadrant, there is no need to upload an original 3000-pixel photo, which is 5 times wider than the 600-pixel area needed. If you use an editor’s resizing handles to make these huge pictures small enough to fit in the corner of the page, the file size is still 3MB in size, because what you really did was to make the image appear smaller, but it will still retain its bit and file size. However, if you resize an image before you insert it, you will greatly reduce your file size.
But here’s an interesting number, not only is the width of the resized photo 5 times smaller, but the height will also be 5 times smaller. Consequently, the resized image is actually 5 times 5, or 25 times smaller and it will load much faster!
Below, are several ways to optimize a photo for the web.
 CROPPING: You can crop a photo several ways. Almost all photo editor programs and smartphones include a Cropping tool on their toolbar. This tool allows you to select just part of a photo or image, as the tool crops off the remainder that is not selected (see icon at right). If you crop your face from a full body photo, this will make your face more visible and the file size significantly smaller.
 RESIZING: Most Photo or Paint Editors have a resize option. In the most recent version of Windows Paint (Start button > Paint) click the [Home] tab, then click the Resize button. Other programs, such as Photoshop, may simply be Image > Image Size. When you reduce the width, the height is typically automatically resized with the same aspect ratio, so as referenced before, reducing the width by a half, will also reduce the height by a half, making the resulting image about four times smaller.
OPTIMIZE: Photoshop also has a wonderful feature to optimize the file size of an image:
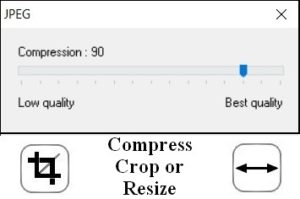
Choose File > Export > Save for Web. Photoshop will bring up a dialog box which will allow you to choose different formats and different qualities for the exported image. Other programs use a slider, see below, to change the file compression (quality) and optimization level. Keep in mind, you do not need the crispest and highest resolution photo when viewing an image on a smartphone or tablet.

Finally, Screen Captures and Windows .BMP graphics are typically very large files. I often tell my students that .BMP (the standard Windows Bit Map graphics file type) stands for Big Memory Pig. Converting a BMP file to an Internet friendly .JPG file (for photos with many thousands of colors) or .GIF file (for drawings less than 256 colors) can usually reduce the file size to less than one tenth its original size with minimal degradation of quality.
SAVE AS: If you use Microsoft Paint or many other paint programs (Start > Paint) you can choose File > Save As, and under Save as type choose .JPG, .GIF, or .PNG to convert a .BMP to a much more reasonable format and size.
